Running SunSpec Modbus for IEEE 1547 Conformance Tests
Description
SunSpec Modbus is one of the communication protocols specified by the IEEE 1547-2018 standard. To ensure interoperability, reduce integration costs, and avoid future complexities, it is highly recommended for SunSpec Modbus devices to complete the conformance testing.
This use case describes the creation and running of the SunSpec Modbus Tests for IEEE 1547 conformance. While the final testing is implemented by Authorized Test Labs (ATLs) and/or SunSpec Alliance, the users can develop the SunSpec Modbus device using this feature to ensure that their implementation conforms with both SunSpec modbus protocol and IEEE 1547 standard.
The software developers can update the SunSpec Modbus interface according to the requirements that are tested here. This feature will help with providing the developers the confidence before approaching a testing organization.
The certification tests consist of the following categories (as applicable to the model):
- Pass SunSpec device-level tests
- DEV-1 General Discovery
- DEV-2 Model 1 Support
- RTU-1 – RTU Interface
- RTU-2 – Baud Rate
- RTU-3 – Partial Request
- TCP-1 – TCP Interface
- TCP-2 – Partial Request
- TCP-3 – Multiple TCP Packets
- Pass SunSpec model-level tests
- MOD-1 Model Implementation
- MOD-2 Model Read
- MOD-3 Point Write
- CRV-1 Curve 1
- CRV-2 Apply Settings
- CRV-3 Apply Settings Error
- REV-1 Reversion Timeout
- REV-2 Reversion Time Update
- REV-3 Reversion Cancel
Additionally, we check for the following:
- Scale Factor
- Rejection
While most of these tests check for conformance with IEEE 1547 standard, there are some tests that check if the basic modbus functionalities have been implemented correctly. For details on each of the tests, please refer to Conformance Details.
Procedure
To run the SunSpec Modbus for IEEE 1547 Conformance Test, a connection to the Device Under Test (DUT) must be established. This has been covered in Connecting to a Device. Once the connection has been established, follow these steps to run the tests:
-
Create a PICS: A Protocol Information Conformance Statement (PICS) is an Excel file that lists all the SunSpec models along with the points that are implemented by the DUT. To do this, Click on
Device → Create PICS. This will open a dialog box where the product information, submitter information, and DUT information can be entered. Save the PICS at a desired location in the file system.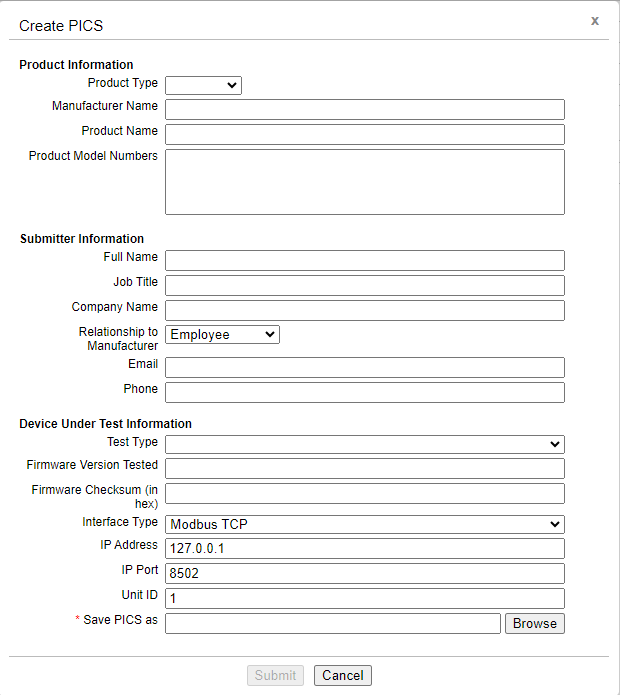
-
Create Certification Test: After the PICS has been created, go to
SunSpec Certification → Create
   Certification Test
. Here, provide a name for the test along with the PICS file generated in Step 1. This will create a new certification test under the SunSpec Certification tab.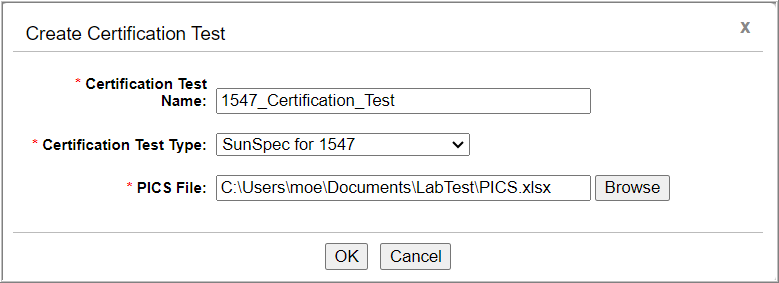
-
Run Certification Test: Once the test has been created, it will be accessible under
SunSpec
   Certification → Tests
. Click on the test name to open a new tab with all the SunSpec certification tests.
These tests can be expanded to view each test under the models. During development, a specific set of tests can be selected to run and test the device capabilities. Select the tests to run and click the green arrow to start.
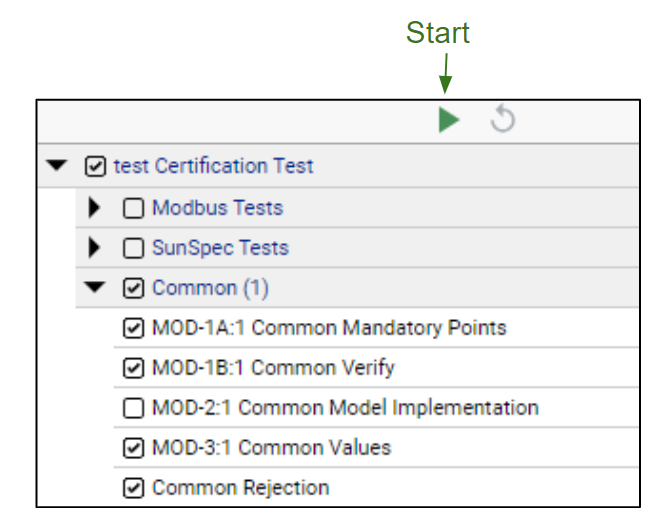
Note: During the certification testing, all the tests need to run and pass to obtain certification.
Result Analysis
Every run of the certification tests generates a result file. The results are located under the tests. The results can be viewed in two ways.
-
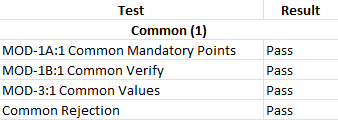
Results via GUI: To see the results on the Labtest GUI, expand the results to see the tests that have been run:
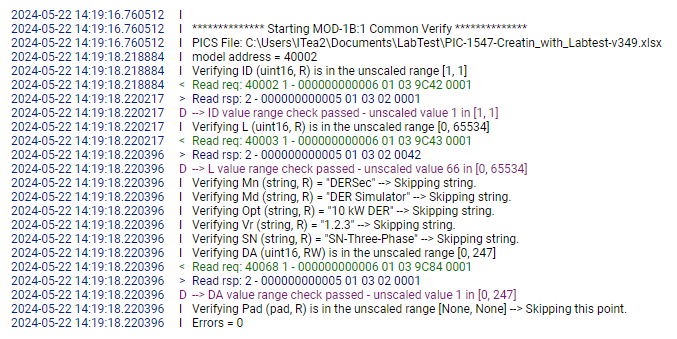
When a specific test is clicked on, the right side of the GUI shows the logs from that test. The log contains the test name, test status (Pass/Fail), and test logs with timestamps. The last log shows the error count.

-
Results via Excel: For a more detailed evaluation, the results can be opened in an Excel workbook.
The Excel file contains all the tests that were run. The first worksheet is called Summary which contains the overall results for all the tests. The second worksheet consists of the logs along with the modbus communication messages. The log entries archived here are - timestamp, log level, type of message, message, and the connection ID.

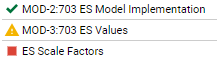
Result Interpretation: When a test completes, there can be two outcomes - either the test passes or fails. In case the DUT passed a test, the result will have a green check mark in front of the test name. If a test fails, it will be depicted by a yellow warning sign. In case a test was stopped while it was running, a red square will mark that test.
In addition, for the failed tests, the logs will show the error message with log level E and message type Error.
Note: While Labtest Pro generates a Pass or Fail result for each test, the final verdict on whether the DUT passes or fails the certification testing remains with the organization issuing the certificate.