Running IEEE 1547.1/UL 1741 SB Conformance Tests
Description
This feature allows a user to run IEEE 1547.1/UL 1741 SB Conformance Tests against the DUT. To run these tests, the setup requires connection to an AC simulator, DC simulator, a Data Acquisition system and a Results Processing setup. To achieve interoperability and compliance with IEEE 1547.1, the tests present in this setup include the Type Tests (Clause 5) and Interoperability Tests (Clause 6) listed in the IEEE 1547.1-2020 document.
The automation of IEEE 1547.1/UL 1741 SB testing helps in following ways:
- Helps cut down time and cost for the testing labs
- Aids in development of the DUT
- Eliminates human errors during testing (specifically related to timing issues)
- Allows for repeatability in running the tests
- Creates a standard test setup for all the devices
Create a Project
To get started, a new project needs to be created. From the main page, click Automation → Project → New to create
a new project. In the dialog box, items marked with a red asterisk are required.
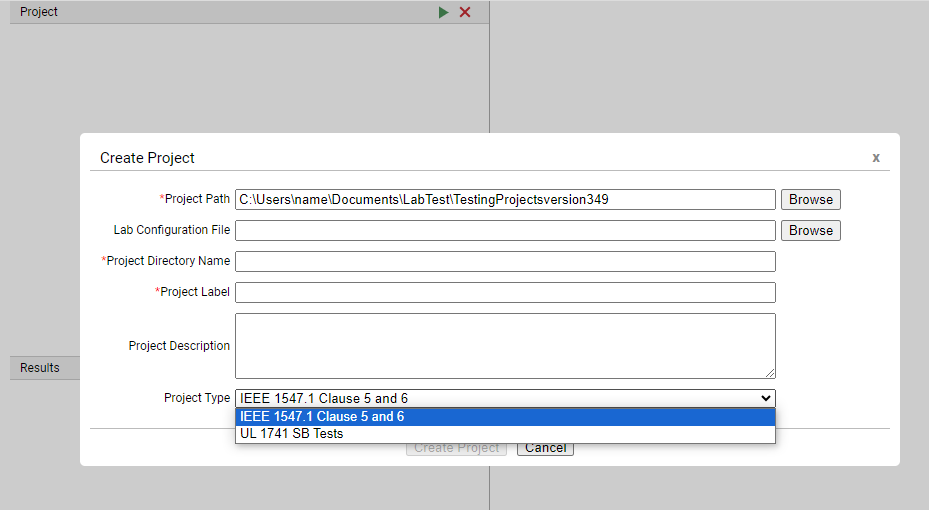
Please fill in the following information:
- Project Path – Path where the new project folder will reside
- Lab Configuration File – Path to a previously downloaded configuration file
- Project Directory Name – Name of the project folder
- Project Label - Text at the top of the project to track multiple projects.
- Project Description – Optional details about the project.
- Test Types:
- IEEE 1547.1 Clause 5 and 6 – Type testing and Interoperability compliant with the standard using communications to DAS, DC/AC simulators, and EUTs.
- UL 1741 SB Tests – directly references UL 1741 SB.
Configuring Project Settings
Once the project has been created, the right side of the GUI will show Project Settings. Before running a project,
the lab configuration and parameters need to be set to match the DUT. Click on the pencil icon to enter edit mode.
The lab configuration consists of:
- Data Acquisition Driver (DAQ)
- DER Interface (SunSpec Modbus, IEEE 2030.5, DNP3)
- AC Simulator
- DC Simulator
- Results Processing
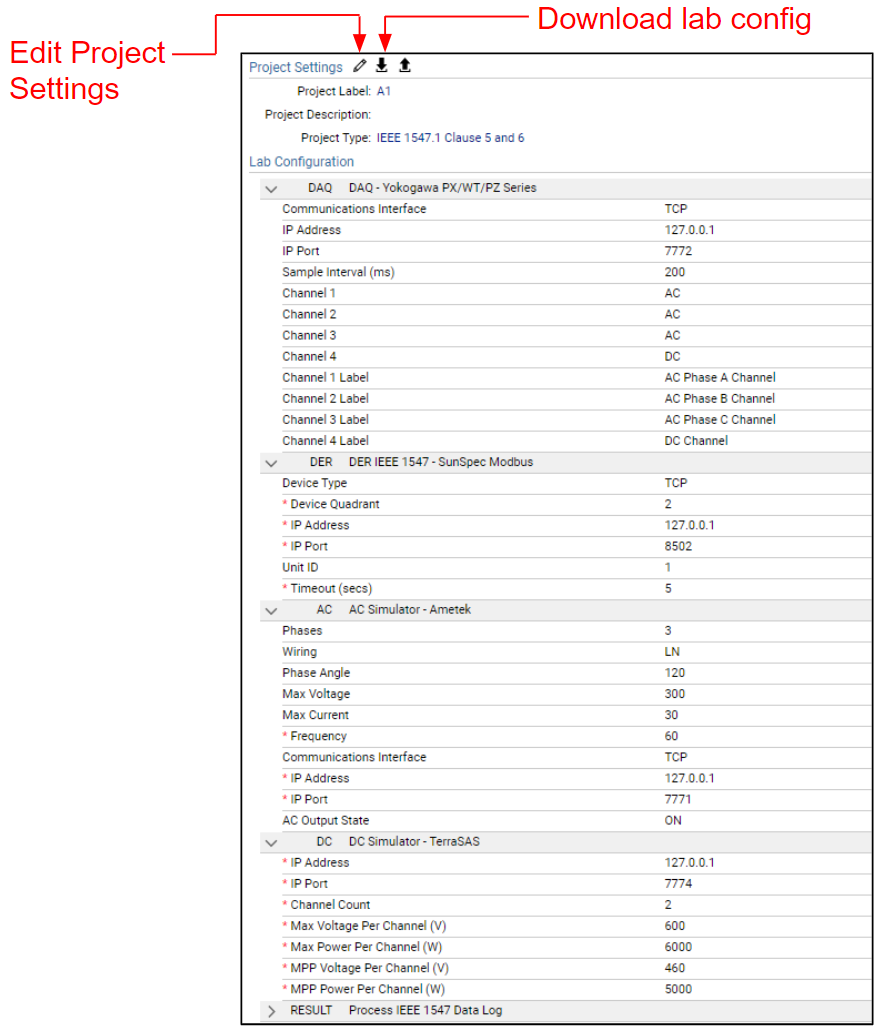
For each of the interfaces, the DER Simulator supports one kind of default setup. In case the user doesn't have electrical or data acquisition equipment, the defaults can be used. Apart from the simulated drivers, the LabTest Pro also supports a variety of other drivers. For more information, refer to Projects Details For interfaces for which the user has a physical device, the settings can be adjusted to connect to the corresponding devices. For each interface, the fields marked with the red asterisk must be filled.
After setting the lab configuration, the DER Parameters must be updated to match the DUT's settings. These are the parameters that are required to run the tests.
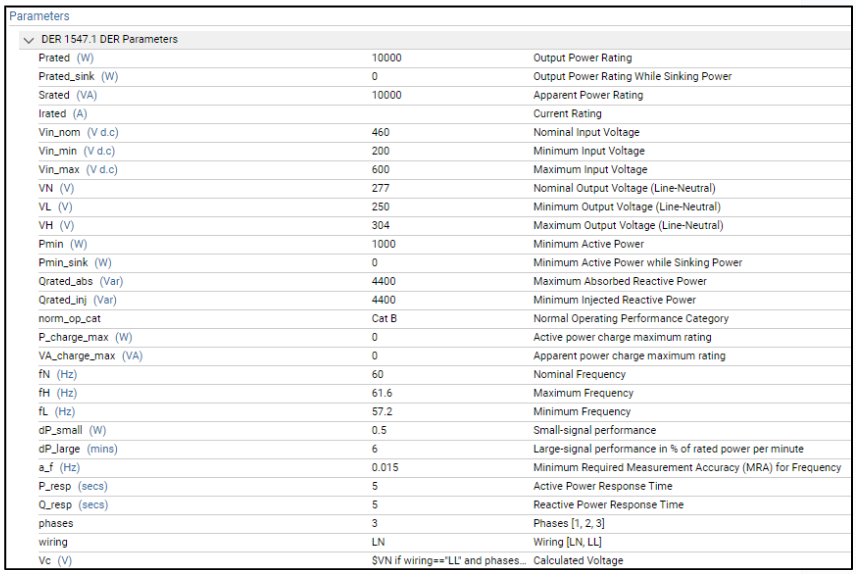
Once all the settings have been updated, click Save to save the settings. The updated settings can be downloaded
into a lab config file for future uses. Now, the project is ready to run.
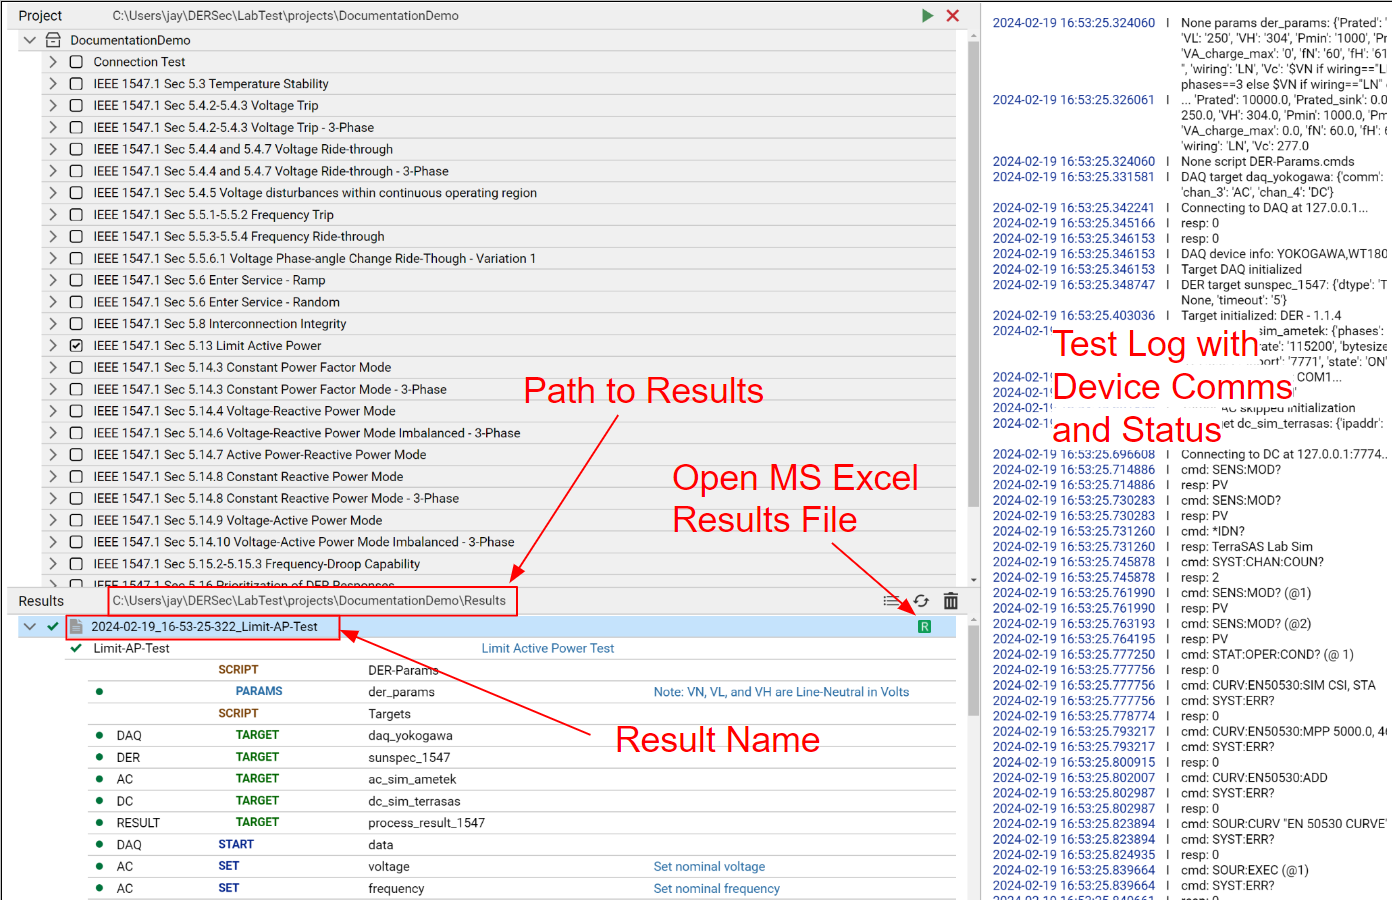
Running Projects
In the Project environment you will find the following information.

The user can select the tests to run. Each test suite consists of all the required variabilities as described in
IEEE 1547.1-2020. For compliance, every test would be needed to run. During development, the user can run a specific
test to check if the DUT is behaving correctly. When the test is running, the right side of the screen shows the steps
of the test script being run. All the wait times in the tests are based on the procedures mentioned in the standard.
However, during development, the Continue from Wait can be used to skip a wait time.

When the tests are finished running, the results will be displayed on the bottom left. A result can be expanded to see the logs on the right side of the screen. The green X can also be clicked to open the MS Excel results file. The Excel file interpretation is covered in the Results Analysis